
Home NAS storage with the Raspberry Pi
NAS stands for Network Attached Storage. A method for making a hard drive accessible to anyone over a local network, for storage, backups, etc. Most common in the business sector, NAS allows for a common place for all backups to be sent, work to be stored by employees, or common files everyone needs to access to be saved. Most can be programmed to store data in a RAID 1 array, or data mirroring. Basically, a NAS can be setup to store its data mirrored across 2 different hard drives, in the same NAS computer. This gives a level of redundancy. If one of the 2 drives fail, the data will be safe on the second drive. Western Digital make the most popular commercially available NAS systems for consumers, under their brand "My Cloud". Western Digital My Cloud systems are currently my recommendation to anyone looking for a redundant storage method for their families or small businesses, outside of making and configuring on yourself.
At the heart of a NAS system, there is just a computer. You can use an old computer you have laying around if you want to, or you can use a Raspberry Pi (as I'll be showing the guide for). The Raspberry Pi allows for a small form factor, low power consumption computer base, that has 4 USB ports for connecting storage drives, and onboard ethernet. The only limitation to the Raspberry Pi for this use, compared to other bases, would be the speed. The Raspberry Pi is limited to 10/100 mbps speed, whereas newer dedicated NAS systems can run 10/100/1000 mbps (gigabit) speeds. However, for the cost, the pi is the best option for network storage needs if you are on a budget.
Now, the difference between a NAS and a cloud are a little more obvious than you may think. A cloud is a common term thrown around, but few understand what it actually is. A cloud is just you, storing your data, on someone's computer somewhere. Google cloud keeps your data on their server, Onedrive is stored on Microsoft servers, iCloud is stored on Apple's servers, etc. A cloud is just your data, accessible anywhere, being hosted on someone's computer. A NAS, usually, is just for data storage locally. So in your house, at your office, etc. If you setup your NAS for access outside your house, you essentially have your own cloud.
Lets get started
What you will need to do this hack:
- a Raspberry Pi
- An External Hard Drive
- One keyboard connected to the Raspberry pi
- A usb hub since the Raspberry Pi will use ports
get your kit :
/|\
/\
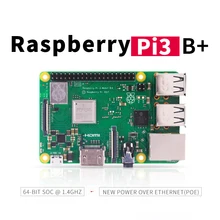
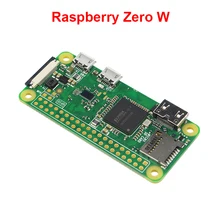 AliExpress.com Product - 2017 Raspberry Pi Zero W Board 1GHz CPU 512MB RAM with WIFI & Bluetooth RPI 0 WAliExpress.com Product - 2018 new original Raspberry Pi 3 Model B+ (plug) Built-in Broadcom 1.4GHz quad-core 64 bit processor Wifi Bluetooth and USB Port

 AliExpress.com Product - 2017 Raspberry Pi Zero W Board 1GHz CPU 512MB RAM with WIFI & Bluetooth RPI 0 WAliExpress.com Product - 2018 new original Raspberry Pi 3 Model B+ (plug) Built-in Broadcom 1.4GHz quad-core 64 bit processor Wifi Bluetooth and USB Port
One other thing to note, before we get too far into this, is file formatting. Whenever a hard drive is initialized for file storage, the drive must be setup with a file format type. A certain type of indexing to help the drive communicate with computers, and store data in a way that logically makes sense. There are 3 most popular formats today worth knowing about.
Windows:NTFS (New Technology File System)
MAC: HFS/HFS+ (Hierarchical File System)
Universal: exFAT
We are going to write this guide assuming you have NTFS format on your drive, simply because most commercial external hard drives come pre-formatted for NTFS.
MAC: HFS/HFS+ (Hierarchical File System)
Universal: exFAT
We are going to write this guide assuming you have NTFS format on your drive, simply because most commercial external hard drives come pre-formatted for NTFS.
Step 1:
Connect a drive to one of the pi's USB ports. Drives with external power sources work best due to pi's limited power output over USB. This drive, when configured, will act as the storage for you files. For ease of use, plug in the hard drive before you turn on the pi.
Step 2:
For this guide you will need a terminal window. If your pi auto-boots to terminal, awesome! if not, hit CTRL+ALT+T(depending on the age of your Pi software) or open a terminal window from the menu in the top left.
Step 3:
Install necessary packages for ntfs to work (linux works off a series of "packages" to help it run commands it needs) NTFS (most commonly Windows file systems) are by default not compatible with Linux. So here we are installing a package that will allow us to read and write to NTFS file types. Type the following command into your terminal: 'sudo apt-get install ntfs-3g'

Step 4:
Identify path through fdisk Linux by default does not make any newly attached storage device accessible. We need to identify where in the system our hard drive is, so later we can "mount" it to a directory for use. Type the following command into your terminal: 'sudo fdisk -l' You sould see all the disks on your system show up. Assuming you don't have any other storage devices plugged in, the second disk should be your storage drive. It should be labeled something like /dev/sd__

Step 5:
Create a directory to mount the drive Now that we have identified where the drive is in our computer system, we need to create a folder for it to mount to. Mounting the drive makes it accessible for read/write. Type the following command into your terminal: 'sudo mkdir /media/USBHDD' This is creating a folder, named USBHDD in the /media sub folder.

Step 6:
Mount the drive Now that the mount folder has been created, we need to actually mount the drive. The command below is the one I use for my drive located at /dev/sd__. If when identifying the path to your hard drive, you had a different path, than you may need to change the command. Type the following command into your terminal: 'sudo mount -t auto /dev/sd__ /media/USBHDD' Now, if you navigate to /media/USBHDD, you will be in the directory for your hard drive!

Step 7:
Download Samba Samba is a program that emulates a windows network share. Basically, by installing samba, you will be able to read/write to your external hard drive from any windows machine. Type the following command into your terminal: 'sudo apt-get install samba samba-common-bin'

Step 8:
Setting up the .conf file Now that Samba is installed, a bit of configuration is needed. Here we are going to set the location for the Samba share, as well as permissions and names. Type the following command into your terminal: 'sudo nano /etc/samba/smb.conf'

Step 9:
Next, scroll down to the bottom of the file, and type the following: [Cloud] comment = Cloud Folder path = /media/USBHDD valid users = @users force group = users create mask = 0660 directory mask = 0771 read only = no Once you are done, hit "Ctrl+X", then "Y" when prompted to save and exit the file.

Step 10:
Create Samba user account/main user account for it Type the following into your terminal to create a new user called cloud1234: 'sudo useradd cloud -m -G users'

Step 11:
Type the following into your terminal to create a password for the user cloud: 'sudo passwd cloud' set the password following the prompts on the screen

Step 12:
Type the following into your terminal to set a samba password for cloud. You can use the same password: 'sudo smbpasswd -a cloud' set the password following the prompts on the screen

Step 13:
At this point, everything should be all set up! Open up a windows machine, file explorer, and go to the network tabe. If a little popup comes down at the top of the screen, click it and hit enable. This is just asking if you want to enable network sharing. Enter the username "cloud" and the password you set for the samba password. It should open up, and everything should be configured!
Step 14:
Step 14:
Modify fstab to auto-mount the drive We need to tell the pi to auto-mount the USB hard drive on startup, so type the following command into your terminal to open the correct config file: 'sudo nano /etc/fstab'

Step 15:
Add the following line to the bottom of the file: '/dev/sd__ /media/USBHDD autho noatime 0 0' Once you are done, hit "Ctrl+X", then "Y" when prompted to save and exit the file.

That's it! Everything is all set! Enjoy your own personal cloud! (And encourage everyone in your family to do regular backups!)
source : https://goo.gl/8wzp8T
Comments
Post a Comment