Now that you have
introduced a Ubuntu box in your home environment, now lets make a proxy which does some acceleration via caching.
For your initial setup of the env - follow this....
Now go for saving
your internet bandwidth (caching) and also acceleration

Installing and Configuring Squid Server
Installing Squid
server on Ubuntu/Debian machines is very easy, all what you have to do is, just
run the following simple command in the terminal.
$ sudo apt-get
install squid
The default
configuration file for squid is located under ‘/etc/squid3/squid.conf‘
or ‘/etc/squid/squid.conf‘. This file
contains some configuration directives that needs to be configured to affect
the behavior of the Squid.
Now open this file
for editing using Vi editor and make
changes as shown below.
$ sudo vi
/etc/squid3/squid.conf
Now, you may search
about the following lines and change them as requested, in the Vi editor, you
may search about those lines by hitting the ‘ESC’ and typing “/” key to writing the specific lines to look
for.
- http_port : This is the default port for the HTTP proxy server, by default it is 3128, you may change it to any other port that you want, you may also add the “transparent” tag to the end of the line like http_port 8888 transparent to make Squid proxy act like a transparent proxy if you want.
- http_access deny all : This line won’t let anybody to access the HTTP proxy server, that’s why you need to change it to http_access allow all to start using your Squid proxy server.
- visible_hostname : This directive is used to set the specific hostname to a squid server. You can give any hostname to squid.
After making above
changes, you may restart the Squid proxy server using the command.
$ sudo service
squid3 restart
OR
$ sudo service squid
restart
Now to test that
your proxy server is working or not, you may open Firefox and go to Edit –> Preferences
–> Advanced –> Network –> Settings
and select “Manual proxy configuration”
and enter your proxy server IP address and Port to be used for all connection
as it follows.
Once you fill all
the required proxy details, you will be able to surf the Web using your Squid
proxy server, you may do the same thing in any other browser or program you
want.
To make sure that
you are surfing the web using your proxy server, you may visit http://www.ipaddresslocation.org/,
in the right top corner you must see the same IP address as your server IP
address.
The default log file
for Squid server is in ‘/var/log/squid3/access.log’
or ‘/var/log/squid/access.log‘ , you may
check this file if you faced any errors or if you want to know which websites
are being visited by people using Squid proxy settings.
Check Squid Logs
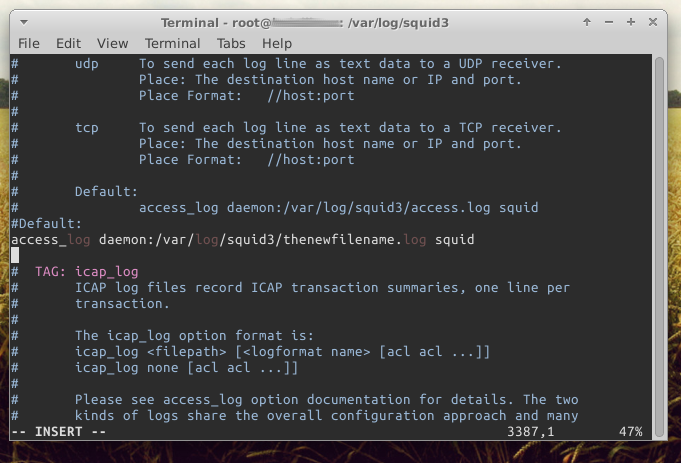
If you want, you can
change the default log file path by editing the ‘squid.conf‘
file and searching for the line which starts with “access_log daemon” and uncomment it and change the default log
file path, it must be something like this.
$ access_log
daemon:/var/log/squid3/newfilename.log squid
For further
configuration settings and for further details about Squid, you may check the
official documentation at:
To confirm that your
Squid Proxy is operation - run the following command
Also gives you and
idea of how your devices are accessing internet.
sudo tail -f
/var/log/squid3/access.log

Comments
Post a Comment